

ZMR250 Mini Quadcopter Build

Introduction
I have been interested in quadcopters for a while and I finally got around to building one. This page covers my ZMR250 Mini Quadcopter Build, why I chose the ZMR250 kit, which motors and ESC I chose, and some comments on how it flies.
ZMR250 Mini Quad Parts
This section covers the main parts required to build the mini quad, the frame, motors, ESC and flight controller.
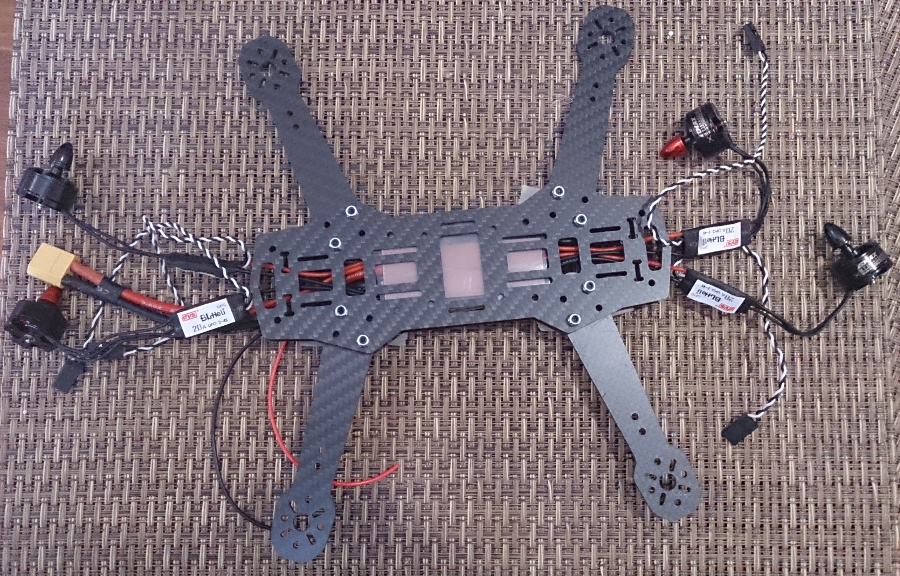
ZMR250 Mini Quad carbon fiber frame
After researching quadcopter for a while I decided to go for a 250 size quad, this means the distance between the motors is 250mm. The 250 size quads seem popular and there are many different frames available, many of the 250 size quadcopter frames are similar, I chose to go with the ZMR250 mini quad design and purchased a carbon fiber kit.
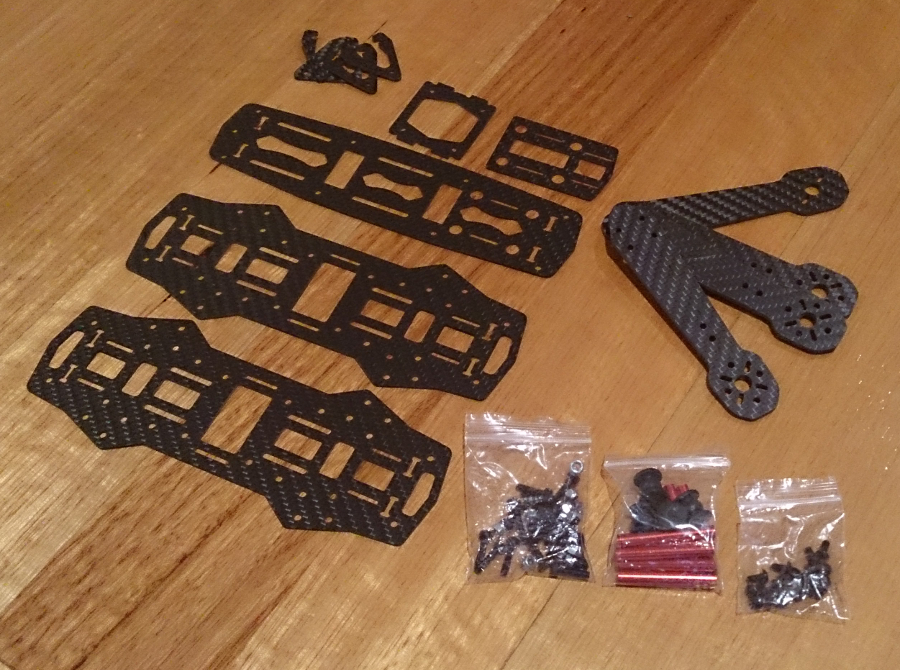
Carbon fiber quadcopter kits are common as carbon fiber is strong and light weight. Frames built from other materials such as fiberglass are also available however I chose to go with a carbon fiber ZMR250 mini quad frame, as I though it would be more durable.
Some quadcopter kits include a power distribution board as part of the frame, a power distribution board is a PCB (Printed Circuit Board) which helps to route power to the four motors. You can get ZMR250 carbon fiber qaducopter frames where one of the plates which makes up the frame is also a power distribution board (ie the power distribution board is part of the frame) however I chose the ZMR250 carbon fiber qaducopter frame with out the power distribution board, I did this so that all of the frame pieces were carbon fiber and hence hopefully the frame is stronger.
ZMR250 Mini Quad carbon fiber kits can be purchased from a number of sources, Ali Express, Ebay, fpvmodel.com etc. The kit I purchased has 3mm thick carbon fiber arms and 1.6mm thick body plates, it is very tough and durable. I would recommend a carbon fiber kit with 3mm arms some places such as fpvmodel.com offer replacement 4mm carbon fiber arms - I can not see myself braking the 3mm arms but if I do I'd then consider getting the 4mm thick arms. Note if you purchase from fpvmodel.com you can also select the arms which have the holes for different size motors ie 1806 size or 2204/2206 mounting holes.
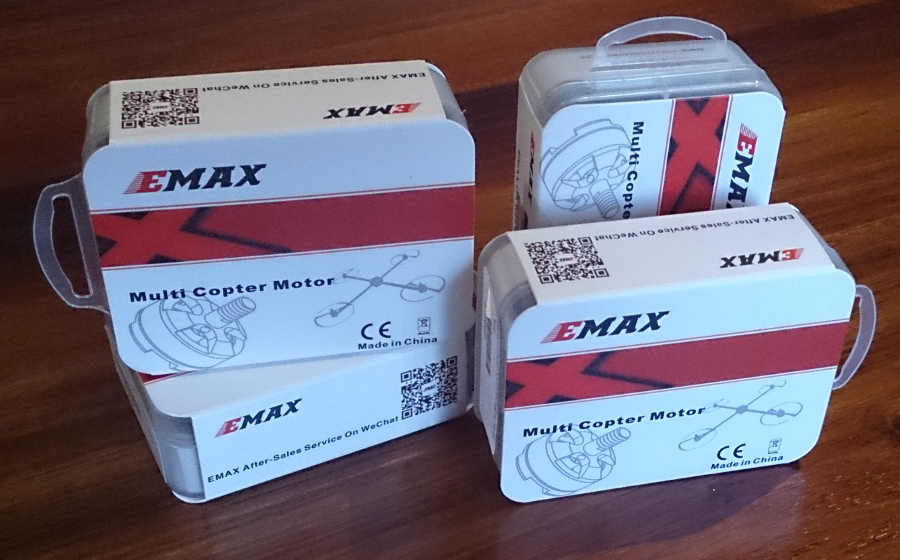
Emax MT1806 2300kv brushless motors
After reading about other people experiences with 250 size quadcopters I decided to go with 1806 size 2300kv motors. Using 1806 size 2300kv motors with 5x3 sized props seemed to be a common setup for starting out in 250 sized quads. The 5x3 props are suggested as a starting point then once you become more experienced and confident you can move to 5x4.5 props which provide more thrust and hence makes the quad more responsive. The super experienced pros who race 250 sized quads use larger 2204 or 2206 motors and 5x4.5 or bigger props.

DYS BL20A Mini 20A BLHeli ESC OPTO 2-4s
I opted for DYS BL20A Mini 20A BLHeli ESCs. The motor and propeller combination will only draw in the order of 12A (amps) - so 15A or 16A ESCs will suffice. I got the DYS BL20A ESCs which are 20 amp ESC, I got them at a good price and it does not hurt to have a little extra head room.
The DYS BL20A come with BLHeli firmware on them which is designed for quad copters, the firmware on the ESCs can also be upgraded to the newest version using either a USB linker dongle or a arduino.
Naze 32 flight controller
For the flight controller I chose the Nase 32 (Revision 5 was the latest at the time of the build).
A common choice for flight controller firmware is Cleanflight. Cleanflight - Configurator is a Chrome app which allows you to load cleanflight flight controller firmware to different flight controller boards including the Naze32.
To configure the Naze32 the first step is to flash the Cleanflight firmware to the target flight controller, in this case the Naze32. Then in the Cleanflight Configurator software you can connect to your Naze32 and adjust settings of your flight controller, see the receiver inputs etc..
Frsky D4R-II
For the radio receiver I usead a Frsky D4R-II, it is a nice small light receiver which is capable of 8 channels in CPPM mode.
ZMR250 Mini Quad Build
The ZMR250 mini quadcopter frame is pretty straight forward to put together, however there are some slightly tricky parts and some planning is required especially when considering the layout of electronics.
Step 1: Motors and ESC pairs

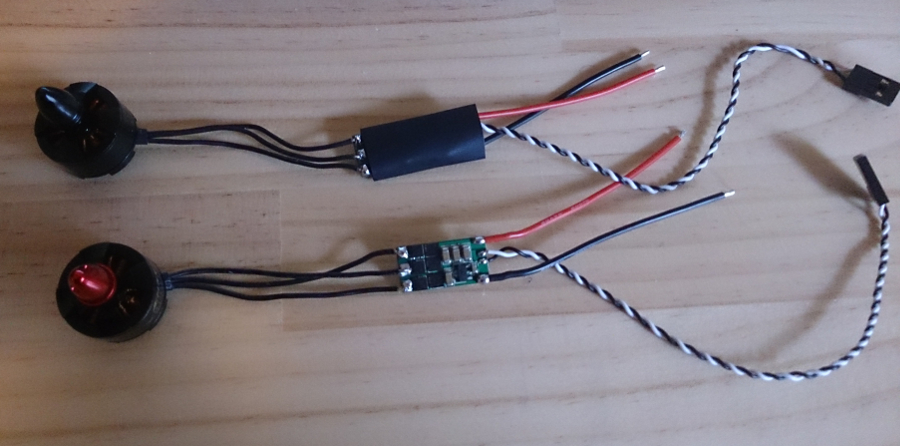
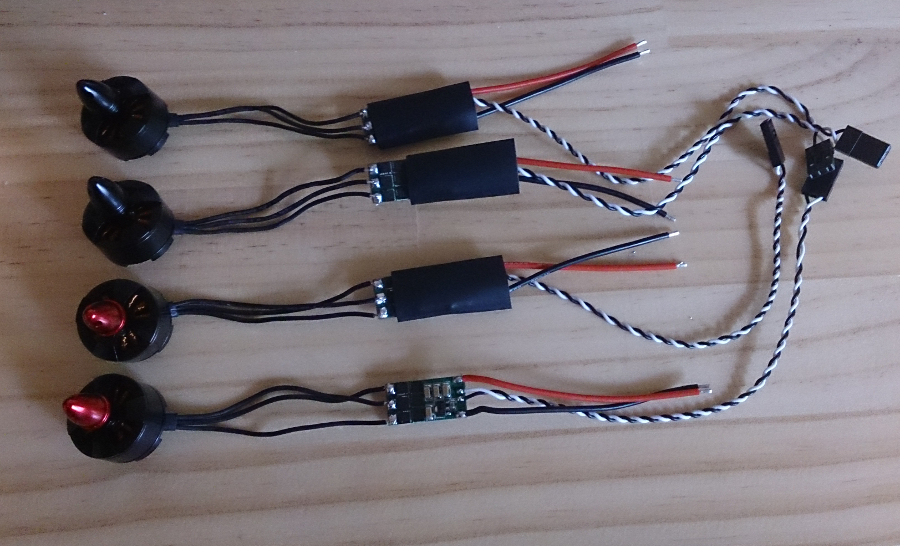

I started by connecting the Emax MT1806 2300kv motors with the BL20A ESCs. For each pair I first removed the exitsing clear heat shrink from the BL20A ESC and also removed the wires on the ESC which connent to the motors by de-soldering them. I then directly soldered the wires from the motor to the ESC. By removing the existing motor wires from the ESC it ment I didn't have to have a connector to join the ESC and motor wires.
Initially when connecting the three wires from the ESC to the 3 wires on the motor it does not matter which go where. If the motor turns in the wrong direction you just swap 2 of the wires. For a quadcopter you need 2 motors that spin clockwisw (CW) and 2 motors that spin counter clockwise.
In my case I also used motors with CW and CCW threaded prop sharfts. The idea with CW and CCW threaded prop sharfts is that motors with CW threaded prop sharfts spin CCW and motors with CCW threaded prop sharfts spin CW, this is so that if the prop and nut come loose the nut should tighten itself and not fly come off. If you not using CW and CCW threaded prop sharfts (ie all CW) you can simply use a nylon lock nut to ensure it stays on tightly.
So in my case with my case the CCW threaded prop sharfts motors (with black nut) had to spin CW. My CW threaded prop sharfts motors (with reb nut) had to sping CCW.
I started with one motor and ESC pair, CCW threaded prop sharfts motor (with black nut) and ESC, soldered the motor wires in straight line to the ESC and then powered up the ESC and tested the ESC and motor with a receiver to test the direction - it turned the correct way, CW. I then soldered the other CW threaded prop sharfts motor (with black nut) and ESC again with straight through connections.
For the CW threaded prop sharfts motors (with red nut) and ESC pairs I crossed 2 wires between the motor and the ESC so that they wold spin in the opposite, CCW, direction as required. Once all motor and ESC pairs were soldered I tested the motor directions just to be sure.
Step 2: Power distribution - an improvised PDB
Power Distribution Boards (PDBs) are often used as a connection point to route power from the batteries to the motors on quadcopters. Some PDBs also include regulators for 5v and 12v which can be useful.
I opted to make my own PDB and chose to use a seperate 5v regulator (to power my Naze32 and receiver). My home made PDB simply consists to a piece of single sided copper clad board with a strip of copper removed in the center, I use one side for ground and the other for power. Then I simply solder all the ESC power leads and battery power to the same side and all the ground connections to the other side. This is a relativly easy and straight forward solution which has proven to work quite well.


Step 4: Build the frame
Assembling the ZMR250 frame is relatively straight forward for the main part but there are a couple of tricky points.
Assembly of the 2 bottom plates with the arms sandwiched between them is one of the trickier parts of the assembly, there are a couple of things to be mindful of. Before sandwiching the two base plates the red aluminium posts should be fitted to the bottom plate, this is because the head to these screws sits between the two base plates. This also applies for the stand offs to mount the Naze32
When assembling the two base plates there are many parts to get in the correct position, I suggest putting all the screws in position then taping them down so that you can turn the assembly upside down without the screws falling out and then position each of the arms from the under side and then finally the very bottom plate. The final step is then to tightned all the nuts so everything is securely assembled.
In my case as I wanted to hide my PDB between the two base plates it was a bit more fiddly as I had to place the PDB in position and route the wires carefully around the screws and arms to that the wires did not get pinched, it was fiddly but worked out well.
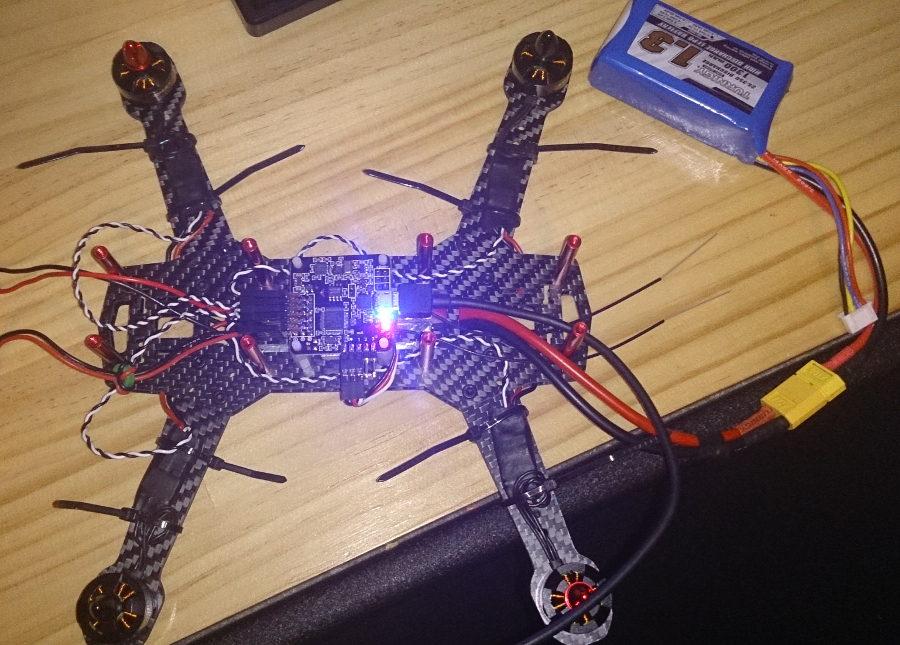
Step 5: Mount the Naze32 and receiver
the Naze32 board mounts easily to nylon stand offs in the center on the frame, it is important ot orientate the board correctly. I chose high enough stand offs so that I could mount my receiver under the naze32, this means the connections between the receiver and naze are short and that the receiver is in the middle of the frame which is good for weight distribution and maintaining COG.
Flying the ZMR250 Mini Quad
This is my first quadcopter so I started off flying line of sight (LOS) with basic things, hovering, and learning to manage the throttle. One good way to practice throttle management is to start at a hover then punch the quad up by briefly applying 3/4 to full throttle then back of the throttle ~1/4 or less so the quad begins to fall then 'catch' the quad by applying throttle and returning to a hover at the same height that you started, this can be tricky at first but is a good skill to master.
Once I was comfortable with hovering and some throttle management is started flying some basic patters like forward and back, or side to side. Example start by hovering the push forward, as the quad tilts forward you will need to apply a bit more throttle to maintain altitude. fly forward ~10 meters hover, then fly backwards to your initial starting point.
The next part I wanted to master was flying circles, this is mor difficult as the orientation of the quad changes. To do this I start by hovering then apply forwad and increase the throttle to maintain altitude, to begin the turn I apply both roll and yaw in the same direction. This will result in a nice banked turn, at this point you will need to manage the throttle by adding a little more throttle to maintain altitude. hold the banked turn for a full circle then return to a hover.
Flying in LOS is a good way to initially learn the dynamics of the quad and observe how the control effect the orientation of the quad and how it flies. Also LOS is usually used when tuning your quad and adjusting parameters such as the PIDs in cleanflight, so flying LOS is a good skill to have.
First Person View (FPV) is soemthing I have also started. I flew just LOS for the first 3 or 4 months but my goal was to progress to FPV flying. FPV is where you mount a video camera and video transmitted to your quad and then have a video receiver to receive the video which you view in some goggles which you wear while flying the quad so it looks like your in the quad. This mean you dont have to worry so much about the orientation on the quad as you are always 'looking our the front' of the quad, so in that sense it is easier.
However FPV has its own challenges, your peripheral vision is limited (even with a wide angle lens) and you are always looking forwards so it your flying backwards or side ways you can not see where you are going which is dangerous. Generally you don't fly backwards or sideways during FPV but when cornering you can drift wide so its important to be aware of your surroundings and have a spotter with you.
Conclusion
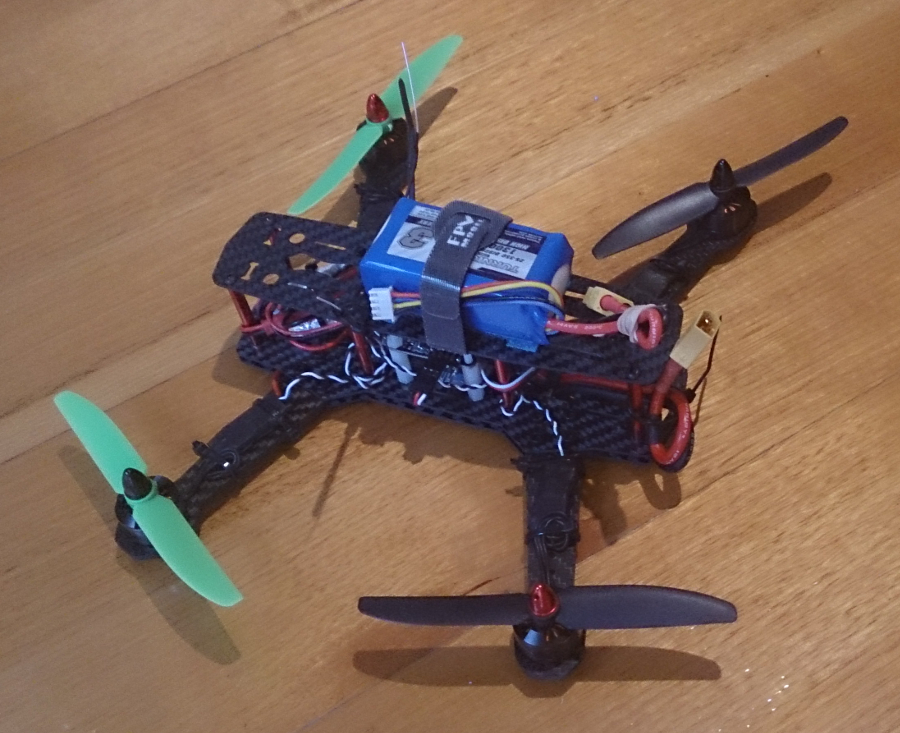
Building and flying a quadcopter is a lot of fun. The ZMR250 mini quadcopter has proven to be a good reliable and strong frame which seems to be well liked by hobbiest and as far as quad copter frames go is inexpensive.
The 250 size of mini quad has also proved to be popular so sourcing parts like suitable ESCs, motors etc. is straight forward and there are many options. The 1806 motors with 5x4.5 props has proven to be a good starting point, the quad is fast enough and can perform flips and rolls, yet it is not too powerful. 2204/2206 size motors are also possible but if you are just starting out I suggest the 1806 as a starting point.
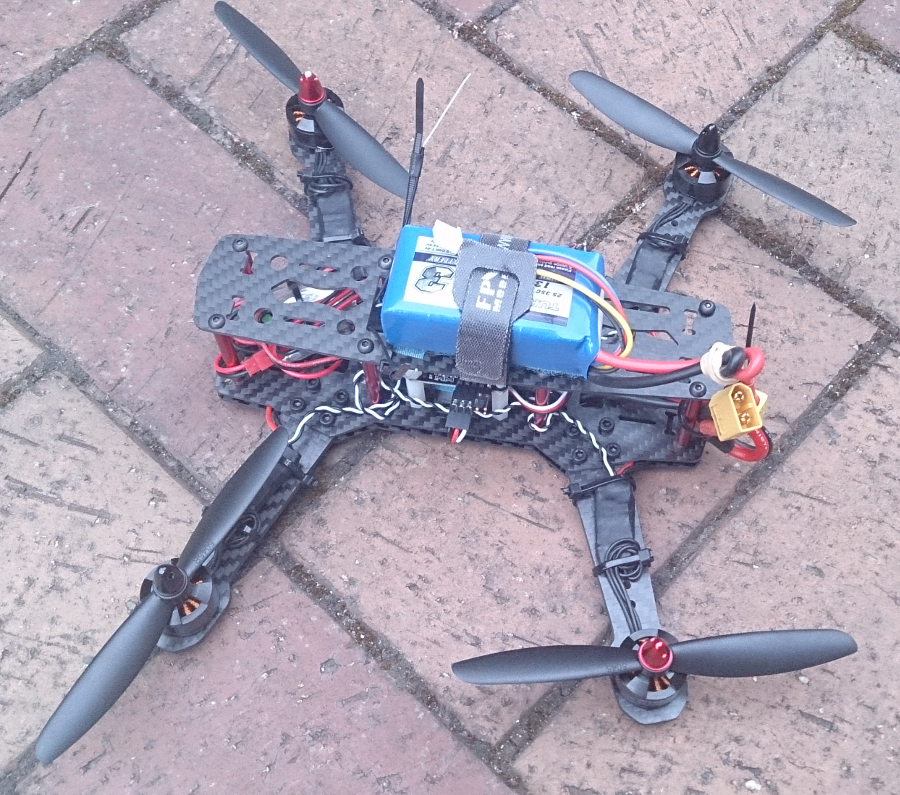
Overall I have really enjoyed building and flying a mini quadcopter, and if you are considering it I'd highly recommend giving it ago, just remember that you will have crashes along the way so always have a bunch of spare propellers on standby!