

Desktop PC Build: Choosing the Parts
Why build a desktop/server PC?
The reason I call it a desktop server is I want it to function like a regular milti-purpose desktop PC but also have some server functionality. It will be a my main storage box, that is store all personal files, media files (ie photos, movies) in a central place but these files should be accessible to other devices at home ie like a file server. Also I want to be able to access the files remotely via a VPN or remote desktop.
I don't plan to host my webpages or email on this desktop/server although this could become an option. I would like to be able to setup and run VMs (virtual machines) on this desktop/server PC too. This would allow me to set up a linux environment.
I wont be using this PC massivly for gaming maybe just light/basic games so a motherboard with on board graphics will be fine as a starting point. The ability to add a graphics card later would be good this should be easy enough to accommodate.
Finally I would like the PC to be quiet and plain looking. So for the case I'm after something minimalist.
Below covers the selection of parts for my PC build. If you would like to read about the actual building of the PC you can read the artical, Desktop PC Build - Building it.
Hardware - Choosing the Parts
CPU

At the time of writing Intel had recently released there LGA 1150 socket CPUs and there out going LGA 1155 socket CPUs and supporting motherboard were becoming difficult to find. Also I read a few reviews regarding AMD Vs. Intel CPUs and for my use Intel seemed the preferred option - so I wont enter into the AMD vs Intel debate. I was also more familiar & comfortable with Intel. So a LGA 1150 socket CPU supporting Intel's first series of LGA 1150 socket CPUs which Intel call their Haswell CPUs was the way to go.
I decided to go with a CPU which can be overclocked, whilst it is not essential overclocking is something I might have a play with in the future. This means I need a i5/i7 K suffix CPU (i7 4770k or i5 4670k) - the K suffix means unrestricted/unlocked and that it can be overclocked.
I chose the i7 4770K (LGA 1150 socket CPU) which has 4 cores, 8 threads, runs at 3.5GHz, includes Intel HD 4600 graphics, has 6MB L3 cache and supports hyper-threading. I went for the i7 over the i5 mainly due to the i7 having hyper-threading and extra threads which could be useful in some scenarios such as running VMs (Virtual Machines).
Motherboard and Chipset
The next decision to make was which chipset and hence which the motherboard to get. The motherboard and chipset go hand in hand when determining the features & functionality of the motherboard. For the LGA 1150 socket CPUs there are a number of different chipsets which support different features, this along with the motherboard manufactures decisions contribute to the final functionality of the motherboard.

Wikipedia has a page for LGA 1150 which has a good summary of the LGA 1150 chipset capabilities
The Z87 chipset supports full overclocking and all 3 of the Q87, H87 and Z87 chipsets support RAID. One important thing to keep in mind is that the chipset does not determine all the functionalities of the motherboard, manufactures may add aditional chips such as additional SATA controller or USB hub chips to expand the number of ports etc. Conversly a manufacturer may also not implement all features of the chitset (this is less common) but the point is the final check should be to check the motherboard specifications.
Because I decided on an overclockable CPU I required a Z87 chipset motherboard, also I wanted RAID without the need of an expensive dedicated HW RAID card,
 this was also supported by the Z87 chipset. The Z87 chiset also supports 6 SATA 3.0 (6Gbps) ports, 6 USB 3.0 ports and a flexible PCIe 3.0 setup. For people not interested in overclocking the H87 chipset offers the same options without the ability to overclock
- however I have noticed in some cases the H87 motherboards may not have as many options/connectors etc. so you many want a Z87 motherboards simply for the other things it offers.
this was also supported by the Z87 chipset. The Z87 chiset also supports 6 SATA 3.0 (6Gbps) ports, 6 USB 3.0 ports and a flexible PCIe 3.0 setup. For people not interested in overclocking the H87 chipset offers the same options without the ability to overclock
- however I have noticed in some cases the H87 motherboards may not have as many options/connectors etc. so you many want a Z87 motherboards simply for the other things it offers.
After deciding of the Z87 chipset I started looking at motherboards, Asus and Gigabyte seem to be well regarded brands so I started there. Wow there are a lot of different motherboard out there! I managed to find suitable motherboard, the ASUS GRYPHON Z87. It is a micro ATM sized mother board, so smaller than the traditional ATM motherboad. I decided to go for Micro ATX as it still has enough expansion slots for my needs (4 as apposed to 7 on ATX) and will allow my to have a smaller more compact PC.
The ASUS GRYPHON Z87 also features an Intel NIC, and a 5 year warranty - an 'armour' kit is available which covers the board, making the board more ridged, protected and also has some extra fans, I personally don't think the armour kit is necessary.
RAM
The motherboard support a maximum of 32GB of DDR3 RAM, it has 4 DIMM sockets. I decided to get 16GB DDR3 RAM in 2 sticks of 8GB each this will occupy 2 DIMMs, the remaining 2 DIMMs will be empty. If I want to in the future I can upgrade to the maximum 32GB. The RAM I have chosen is Gskill Sniper 1600MHz with a cast latency on 9.
Storage - SSD and HDDs
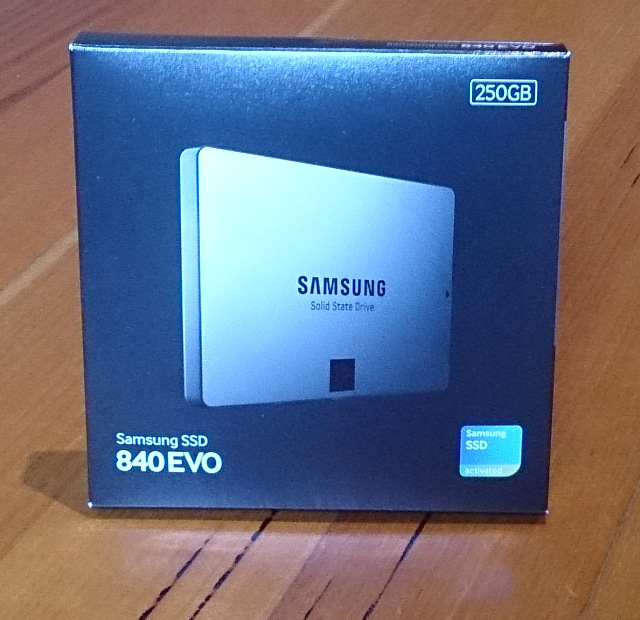
I'm going to use a SSD for the operating system and program drive as it will dramatically improve performance in terms on loading the OS and programs, leading to an improved user experience. I have chosen the Samsung 840 EVO 250GB SSD, it gets good reviews and is only a fraction slower than the PRO version but considerably cheaper. I will also allocate a portion of this SSD to SSD caching so that files from the storage HDDs which are frequently used will be cached to the SSD. This will serve to boost the performance of accessing data on the HDDs.
HDD storage drives, as this desktop/server will be storing everything I have decided to implement RAID 1 (mirroring) of my storage drives so that I always have redundancy - one reason for this is that I'm slack at doing backups. At least with RAID 1 in place I'm protected from 1 HDD failure. But I should still do regular back ups to an external drive. I have chosen to use 2 Western Digital RED 3TB drives.
Case

This was a bit difficult, again there were many things to consider. First the capabilities such as:
- What motherboards the case supports, ATX, micro ATX, mini-ITX etc.
- How many HDD/SSD the case can hold, 3.5" HDD positions for HDD and 2.5" for SSD, note most 3,5" HDD positions also have holes so a SSD can occupy the HDD position
- Room for optical drive DVD, which goes in an external 5.25" bay some cases do not have any (dvds are getting old) but most have at least 1
- Might also consider if you want an external 3.5" which used to be for floppy drives but now you could use for a cards reader
- PCI/expansion slots, these are how many slots at the back of the case for PCI card. I suggest you should have at around the same number as your motherboards supports
- Room for graphics cards, most manufactures state the maximum length graphics card that can fit in the case this is good to keep in mind if you will be fitting a graphics card
- Room for coolers, again most manufactures state the maximum height for tower mount CPU coolers good to consider if you are going to use a tower mount CPU cooler
- Extra things that you might consider is room for water cooling, good cable management etc.

Secondly the aesthetics of the case can be important it depends how fussy you are and what budget you have
- Wether you want a bright case supporting LED lighting or maybe a minimalist design
- Size (the above capabilities will some what determine this)
- Cooling, is good ventilation and room for lots of fans or liquid cooling radiators important for you build? If you are over clocking you should consider this
- Sound proofing, are you after a silent case if so some cases are designed specifically to with noise reducing features such as quiet fans and sound dampening padding
- Front panel controls, all will have a power button but is it important to have front access to USB ports and audio jacks?
I decided to go for a Miroc ATX build, meaning a slightly smaller motherboard and the possibility of smaller cases. I also wanted a minimalist design and preferably a quiet case.
Deciding on a case took me a long time but I finally chose the Nanoxia Deep Silence 4. It fits Micro ATX motherboards, up to 6 HDD/SDD (actually there's also a position for 1 more SSD on the bottom), the HDDs mount in nice trays and the HDD cages are removable if needed. Removing HDD cages will also allow for longer graphics cards. The case is designed to be quiet, it includes 2 120mm silent fans with room for up to a total of 3 fans, there is a mounting position to add either a 120mm or 140mm fan at the top. Two external 5.25" bay are accessible via opening the front door of the case, a 2 channel fan controller is also located behind the door. The front panel located on top of the case has 2x USB3 ports a single USB2 port plus audio jacks. Aesthetically I think it looks nice, minimalist and sleek on the outside. On the inside the layout looks good, with removable HDD cages and also good cable routing options.
CPU Cooler
As the stock Intel heatsink cooler is pretty basic and a little noisy along with the fact that I may overclock the CPU which would result in more heat an aftermarket CPU cooler is required.
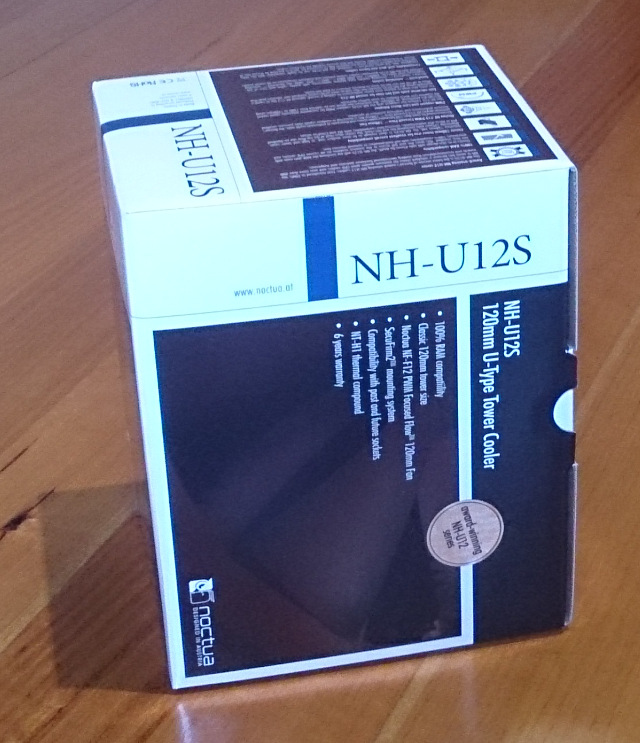
I chose the Noctua NH-U12S. I chose the Noctua NH-12US because Noctua gets great reviews as one of the best in the business for building high quality quiet CPU heatsink coolers. The NH-U12S is a 120mm fan based CPU tower cooler and is designed to be 100% compatible and not block RAM slots - on the Noctua NH-U12S website there is a handy compatibility link where you can check if it will fit your motherboard. Also the NH-U12S is 158mm high so it will just fit in the Nanoxia Deep Silence 4 which can fit tower coolers up to 160mm - so 2mm to spare!
Power Supply
I selected the Silverstone Strider Plus 600W ST60F-PS power supply.
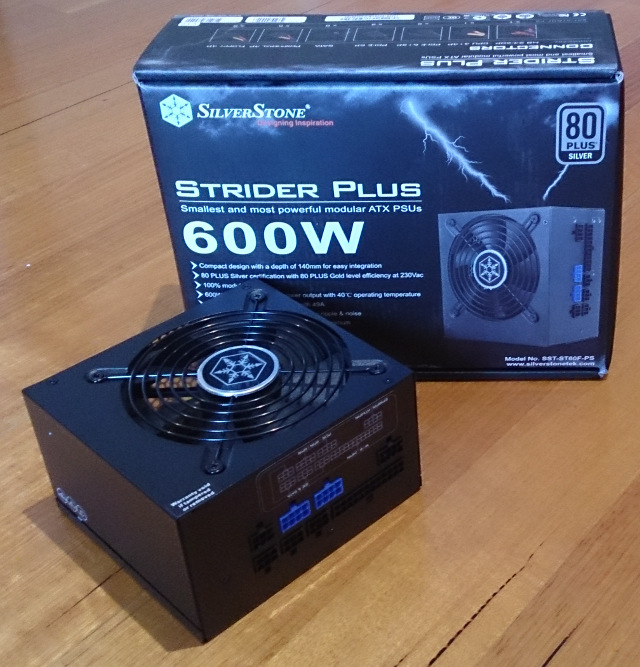
The Strider Plus 600W ST60F-PS power supply is a 600W power supply and its fully modular so I only need to plug in the cables I need, which means there will be no excess cables causing a mess inside the case. This power supply is also only 140mm long which smaller than the standard 160mm. The smaller size is not a requirement in this case, however if you were building in a very small case, maybe for a mini ITX build, then this shorter power supply could be worth considering.
Final Parts List
Below is the list of parts I finally decided on for the build:
| Item | Part | Price $AUD |
|---|---|---|
| Case | Nanoxia Deep Silence 4 | $89 |
| CPU | Intel Core i7 4770K | $385 |
| Motherboard | Asus GRYPHON Z87 | $185 |
| Memory | G.Skill Sniper 16GB Kit (8GBx2) DDR3 1600MHz | $189 |
| SSD (Solid State Drive) | Samsung 840 EVO Series 250GB | $189 |
| HDD (Hard Disk Drive) | Western Digital WD RED 3TB ($179x2) | $358 |
| DVD RW | ASUS 24x DVD RW | $24 |
| CPU cooler | Noctua NH-U12S | $75 |
| PSU (Power Supply) | Silverstone Strider Plus 600W ST60F-PS | $109 |
| Total | $1603 |
Of course if you do not already have them you will need a monitor, keyboard and mouse. You will need an OS (operating system) to run the PC, such as Windows, Ubuntu etc.